
Tech Reference Point
OnePlus 7T Review: Simplistic, Accessible and Modern
If you want a simple and high-end device, then the OnePlus 7T is the one-stop solutions for you. The smartphone is offering many latest and high-tech features that are not even available in other smartphones. It has everything that a tech enthusiast requires. If you currently own a two years old OnePlus model, then it can be a decent upgrade for you, especially if you want all the latest features stuffed into a single device. The OnePlus in itself is a reputable and trustworthy brand among customers. Some people prefer OnePlus mobiles over the iPhone. There is no doubt that Android phones are much better than iOS when it comes to talking about customization and accessibility. iPhones are very limited as you have to use iTunes even when you want to transfer music to your device, and these small inconveniences can make you frustrated for a moment.

Let’s see every significant detail of the “New Android Ruler” and also look at its negative sides.
Modernistic Look and Feel
If you think that OnePlus7 looks a bit different from mobiles, then you are absolutely right. Its screen has no curves means you are getting an entirely flat display with an aspect ratio of 20:9. The screen size is 6.55 inch which makes it a bit bigger than other ordinary smartphones. It has a bit small screen width which makes it surprisingly comfortable while holding in the grip. The display in immersive and realistic. It is less wide than the iPhone 11 Pro Max; however, it still has an impressive display.
The glass is coated with an anti-glare layer which will enhance the visibility in the strong sunlight.
Versatile Camera
The device has three camera lenses on its camera array. The way of placements of these three lenses is quite unique and gives a premium finish. The primary lens of the rear camera is 48 megapixels and has a picture stabilization feature. The other two cameras are 16 MP and 12 MP respectively. In this device, you will also get a refined UltraShot engine to take better shots in mild darkness. It also comes with a Macro mode which can be enabled by an independent button in the camera app interface. The Macro mode will help you to take extraordinarily wider shots that are almost impossible in other devices.
Android 10 and Ultra-Rapid Charging
The OnePlus 7T comes with Android 10 installed by default, and it is a robust feature on its own. The Android 10 is a massive upgrade for Android operating system and is stuffed with many new and exciting features. One of the best features of Android 10 is its Zen Mode that helps you to focus on the most important things by turning off some specific notifications for a selected period. You can use it when you are chilling with your family so that nothing will distract you.
The phone also has an extremely fast charging speed as it can go 17% to 100% in less than 40 minutes. However, the company claims that it can go 0 to 70% in 30 minutes. The phone can charge faster than what the company claims in reality.
Read more
- How to Download Music from Spotify on Your Device?
- How to Forget a Wi-Fi Network on Mac?
- How to Troubleshoot “No Sound” Problem on Galaxy S10?
Major Highlights
- Snapdragon 855 Plus
- 8 GB RAM
- 128GB ROM
- Display refresh rate 90Hz
- 2400 x 1080 pixels
- 20:9 aspect ratio
Wrapping It Up
If you want a powerhouse of performance/features along with a simple look and feel, then this device should be your first choice.
Source : OnePlus 7T Review: Simplistic, Accessible and Modern
Billy Mark is a self-professed security expert; she has been making the people aware of the security threats. Her passion is to write about Cyber security, cryptography, malware, social engineering, internet and new media. She writes for Norton security products at norton.com/setup.

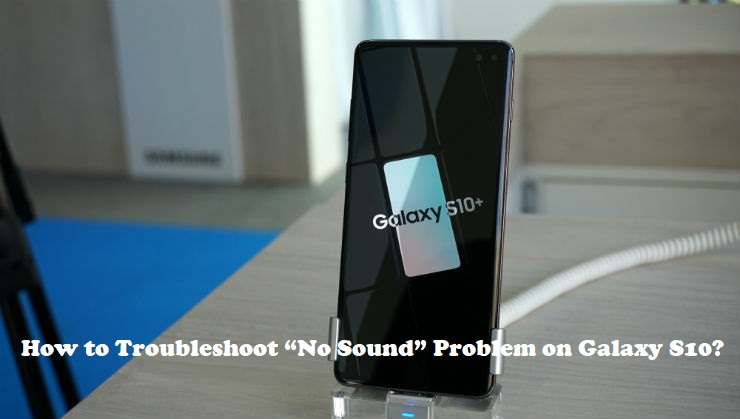
How to Troubleshoot “No Sound” Problem on Galaxy S10?
Beside the AMOLED display technology, Samsung S10 has a decent sound output too. However, a few users are reporting that in their S10, there is no sound. It is a quite frustrating error for the users who are facing it. To fix the error, you must follow this article since we are going to talk about just that.
Solution 1: Undo What Settings You Changed Recently
If you remember that you have played with the settings on your device, then it is a good idea to undo them. Maybe mistakenly you have changed a setting in your device which has caused no audio issue.
Solution 2: Ensure that the Volume Key is Working
Check your Volume key carefully. If it is not working then it means the cause of the issue has been caught.
Solution 3: Ensure to turn off the Bluetooth
Sometimes when your smartphone is connected to a Bluetooth headset or any Bluetooth device, the primary speakers of your smartphone won’t work. The audio output is sent to the wireless devices while the Bluetooth is on. So turn off the Bluetooth and then check if the issue is resolved.
Solution 4: Force Restart
Sometimes due to any temporary software glitch, some sound drivers might stop working. In order to solve such an issue, a forced restart is more than enough. Here’s how to perform a forced restart on your S10:
- Long press the Power + Volume Down keys together and once the device powers off, release the keys.
- Wait for a while until the Maintenance Boot Mode menu appears.
- Use the volume up and down keys to scroll down or up in the menu. To click OK in the menu press the key located on the bottom-left side of your device. Now choose the Normal Boot option in the available menu.
- If nothing happens and no Maintenance menu appears, then it means your device doesn’t have it.
- Now, wait until your device turns off.
Solution 5: Tweaking Sound Settings in Samsung S10
If the audio settings aren’t configured properly, then it might result in the no audio issue.
- Head to the Settings.
- Go to Sound and Vibration
- Now raise all volumes to the maximum level.
- Play a song to check if the sound is playing or not.
Solution 6: Resetting App Preferences
Many apps require default settings in order to work at their best, if you have changed any app preference, then it can stop certain services on your phone such as sound and others. Here’s how to reset the app preferences:
Head to the Settings app.
Press Apps.
Head to More Settings located at the top-right corner (three vertical dots).
Now tap the Reset App Preferences option.
Now reboot your device and see if there are any changes.
Read more
- How to Download Music from Spotify on Your Device?
- How to Forget a Wi-Fi Network on Mac?
- OnePlus 7T Review: Simplistic, Accessible and Modern
Solution 7: Resetting Entire Settings
If nothing is working, then the ultimate answer is to reset all settings of your S10. Here’s how to do that:
- Head to the Settings in our device.
- Go to General management.
- Hit the Reset option.
- Press the Reset Settings button.
- Confirm your decision by pressing the Reset Settings option.
That is how to reset all settings in Samsung S10.
Solution 8: Install Updates
If there are any available updates for the device then installing them can be a decent idea since it can fix all of the things which are causing the no sound issue.
Here’s how to fix No Sound issue in Samsung S10 by installing updates:
- Go to the Settings on your device.
- Head to the System Updates option.
- Now hit the system updates option to begin the updates search. If there are any updates available, then go ahead and install them.
Solution 9: Safe Mode
The Safe Mode is used to diagnose issues that are almost unable to fix. It helps your device services and programs to start up on boot. In the safe mode, it can be possible that the sound of your device comes back to normal. Here’s how to get in the safe mode in S10:
- Long press the power key and release when the Power off prompt comes.
- On your screen, long tap the Power off option and release when you see Safe Mode window.
- Tap on the Safe mode, if asked again for confirmation then press the Safe Mode once more.
- Now the phone will restart and will boot into safe mode by itself.
Now check if the sound is working or not on your device. If the device is playing music in the safe mode, then it means that a third-party app is causing the problem. Check by uninstalling recently installed apps.
Source : How to Troubleshoot “No Sound” Problem on Galaxy S10?
Billy Mark is a self-professed security expert; he has been making the people aware of the security threats. His passion is to write about Cyber security, cryptography, malware, social engineering, internet and new media. He writes for Norton security products at norton.com/setup.

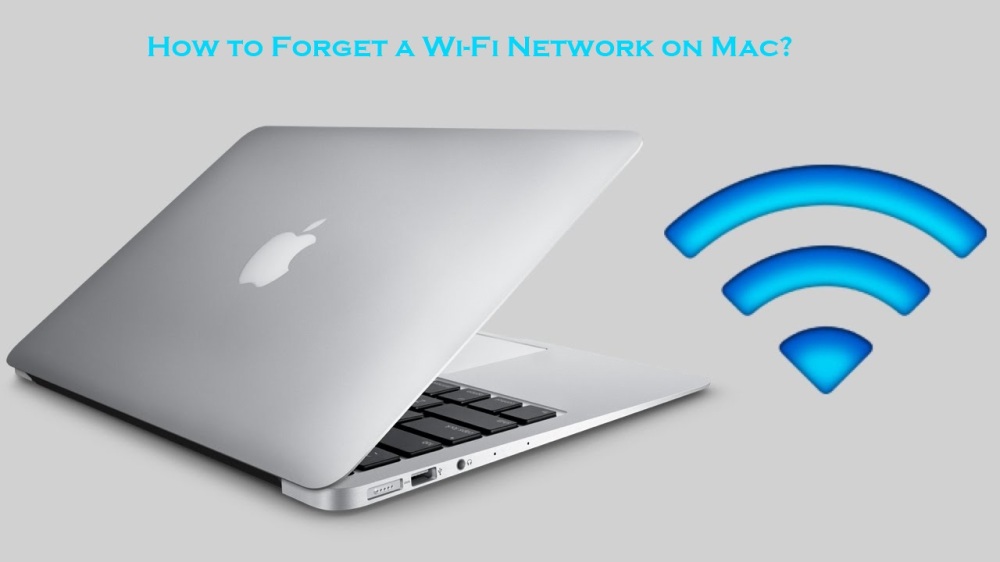
How to Forget a Wi-Fi Network on Mac?
If you want to forget a network on your Mac, then you have come to the right place.
Remembering Wi-Fi networks and passwords is a handy feature available on Windows, Mac, and other devices. But what if you want to remove a Wi-Fi network and its password from your Mac? The process of forgetting Wi-Fi in Mac is not that easy as you might think.
Mac is a perfect device to browse the internet because it won’t lag even after browsing multiple tabs at a time. Mac is also almost invulnerable to internet threats as it comes with pre-installed premium security programs. Read this article carefully, and then you will be able to forget Wi-Fi networks from your device with ease. Let’s get started.
Step 1: Navigating to Network Preferences
- First of all, take your mouse cursor to the Finder bar, after that press the Wi-Fi icon. Now a list of available Wi-Fi networks will appear.
- On the lower side, click on the “Open Network Preferences” option to open the Network Preferences.
- There you can configure all Wi-Fi network-related settings on your device.
Step 2: Open Advanced Settings
Now here you will see the options to remove and add network adapters, Wi-Fi turn off and turn on, and other settings of particular Wi-Fi connections. You can connect to new networks automatically and also ask to join a network manually. There you can also check your network IP address, and that address is beneficial when you want to diagnose other internet issues. You should remember this menu for future use as it can be useful for fixing many network problems such as if you have forgotten the password of a network, then you can easily use this feature.
The main thing we need to do here is going to the “Advanced” option and then scrolling downwards to perform our final step.
Step 3: Remove Network
Now here many settings are available for various purposes, so you shouldn’t panic by looking at this menu. These settings are essential when you want to add networks manually, see the TCP/IP settings and the hardware settings of your network. The unique Wi-Fi Address setting of your Mac is also available there. You can also organize the network’s position in the list by dragging them up to down or down to up. If you only use some specific network on a daily basis, then you can put those networks to the upper position in the list. This will make it easy for you to connect to your favorite Wi-Fi every time.
More To Read
The most important thing we are going to do here to forget a network is clicked on the “network name” that we want to forget. After that, tap on the “minus” icon in the lower side of the list.
Your Wi-Fi network is successfully removed from the saved networks. From now on, your device will not connect and recognize that network automatically. If you want to use that network in the future, simply click on the network and then enter the password manually.
Source : How to Forget a Wi-Fi Network on Mac?
Billy Mark is a self-professed security expert; he has been making the people aware of the security threats. His passion is to write about Cyber security, cryptography, malware, social engineering, internet and new media. He writes for Norton security products at norton.com/setup.

How to Download Music from Spotify on Your Device?
The days of playing the radio to listen to music are gone. Nowadays, there are many on-demand music streaming services available such as Apple Music, Spotify, Amazon Music, and Google Play Music. Spotify is arguably one of the best music streaming services in the world. It is a premium application that does not irritate people by showing ads while listening to music. Spotify allows people to listen to music anytime they want, even when there is no internet available. While traveling in a plane or bus, Spotify can be the best music streamer at your disposal.

You can download your favorite music and playlists on your device to play them in the hour of need when there are no signals in your phone.
In order to download songs in your device on Spotify, you have to purchase a Premium subscription offered by them. The download button won’t be available unless you buy the subscription. So firstly get the plan and then we can start.
How to Download Spotify Songs on Computer or Mac?
Method 1: Downloading Liked Songs
Downloading your selected songs on Mac or Windows is surprisingly very easy, and the process for Mac and Windows is the same. Here’s how to get your songs offline on Spotify:
- First of all, like all the songs that you want to download in your device.
- Then head to the “Liked Songs” on your Spotify application.
- Now press the Download toggle slider button located on the top-right side of your app.
That is it! This is how you can download your favorite tracks on Spotify on Windows and Mac.
Method 2: Downloading Entire Playlists
- First of all, navigate to the playlist that you want to download on our computer.
- Then tap the “Heart-shaped” button situated next to the Play button. By doing so, the playlist will be saved to your library for ease of access. But the songs are still not downloaded on your device, and you can’t listen offline.
- In order to download the songs of that playlist, press the Download slider switch to start downloading music. Once the Download slider is enabled, all songs will be downloaded in your device one by one.
The download link on the desktop app only appears after liking a track or playlist. However, it makes downloading songs a bit difficult for new users since the new users won’t be able to find the download link for songs.
More To Read
How to Get Favorite Tracks offline on Smartphones on Spotify?
In mobile devices, you don’t have to like a song to download it; that is why using Spotify on a smartphone is even more comfortable. Here’s how to download music on Spotify mobile:
- Just load the songs in the queue that you want you to want to download.
- Now on the music player interface, turn the Download slider button and then your download will begin.
Kindly note that you don’t have to like a song to save it offline on your device.
Source : How to Download Music from Spotify on Your Device?
Billy Mark is a self-professed security expert; he has been making the people aware of the security threats. His passion is to write about Cyber security, cryptography, malware, social engineering, internet and new media. He writes for Norton security products at norton.com/setup.

How To View Location History Of iPhone Or iPad?
Do you want to review your location history? Then you just need to have a look on your iOS device. And the plus point of using Google Maps is that you shall get detailed information about the place that you visited. Read on and learn how to check the location history of your iPhone or iPad.
 Source : http://asknorton.com/how-to-view-location-history-of-iphone-or-ipad/
Location history and secrecy
- Majority of us already know this fact that big and famous tech companies and applications do have a type of a location tracking feature on it. For instance, starting from Apple to Google, and so on, every company uses location information in some way or the other.
- Luckily, location tracking can be turned off whenever you want.
Look for location history of the iPhone or iPad
Go through the given below steps carefully for having a look at the location history of the iPhone or iPad.
- Firstly, go to the Settings application.
- Then, press on ‘Privacy.’
- After that, choose ‘Location Services.’
- Next, move downward on display.
- Then, press on System Services.
- After that, click on the ‘Significant Locations.’
- Note that you shall be getting the History part over here.
- If you want to remove the history, you should move downwards, then click ‘Clear History.’
- If you are among the one who wants to prevent location tracking on an iOS device, visit the above of the display and click on the switch next to ‘Significant Locations.’
- Whenever you click on a location section from the ‘History’ part, it shall display detailed information on the upcoming page. Here, you shall be able to view the map of every location.
- Then, click on one of the visits for viewing detailed information about the place you went to. It shall show you not only the exact correct time but also the means of transport with the date.
More To Read
Search location history in Google maps
- Firstly, go to Settings.
- Then, press on Privacy.
- After that, click on Location Services.
- Next, click on Google Maps.
Note: You can easily turn off the Location History feature from the Google account settings if you wish.
- The Google Maps Timeline page shall be viewed on the website on the iOS and PC. Note that you shall be able to view the world map with few areas highlighted. You can move over here, and press on the area to view the given information.
- Towards the above at the left-hand side, you will be able to view the timeline interface. From this place, you shall be able to select any date for viewing the detailed information of the travel information.
Billy Mark is a self-professed security expert; she has been making the people aware of the security threats. Her passion is to write about Cyber security, cryptography, malware, social engineering, internet and new media. She writes for Norton security products at norton.com/setup.

How To Setup Email On Android Phone?
Among the many advantages of having Android phones, the primary benefit is the ability to track your mail account by it. If you are expecting an important message from your co-worker, then having a mail account shall be better. But for availing that facility you need to create a mail ID.
 Source : http://hbnorton.com/how-to-setup-email-on-android-phone/
You can get to know about setting up a mail account in Gmail, Outlook as well as Yahoo with the help of this blog.
The method of creating a Gmail account on Android
Many people believe that Gmail is among the most accessible mail providers for setting up in the Android device. After all, it always comes pre-installed on your smartphone. The only step that should be taken by you is logging in to the mail ID. Go through the given points below for knowing the steps that should be made by you:
- Firstly, press on Settings.
- Then, press on Accounts.
- After that, click on Add Account.
- Next, press on Google.
- It shall get you the Add Account display. Note that over here, you shall be able to create a new Gmail ID or else put your present ID and Password.
- Then, press ‘Accept’ on the Terms which is displayed on the screen.
More To Read
The method of creating Yahoo mail on Android
This method is a bit similar to the above-stated process.
- Firstly, press on Settings.
- Then, click on Add Account.
- After that, press on Email.
- Next, press on Yahoo mail. If you don’t get the option, then you should download the application free by the Google Play Store.
- Then, put the present mail ID and password or else create the new mail account.
- After that, you shall be given some options related to adjusting mail syncs. And about what you would wish having your display name to be in your outgoing mails.
- As soon as you are done selecting the options that you like, press on Next for completing the procedure of making the account.
The method of creating Outlook on Android
- Firstly, go to the Google Play Store.
- Then, you need to download the Outlook for Android application. Fortunately, it is entirely free.
- Next, if you are creating a new account, press on Get Started. It shall result in detecting a few of the account information.
Note: If you are using your existing mail account, then go to your smartphone’s Settings. Next, click on Add Account. Next, press on Outlook.
- Lastly, put the mail ID and password. If by chance, it needs some more details, then it shall ask for the same, you don’t get worried.
Billy Mark is a self-professed security expert; he has been making the people aware of the security threats. His passion is to write about Cyber security, cryptography, malware, social engineering, internet and new media. He writes for Norton security products at norton.com/setup.

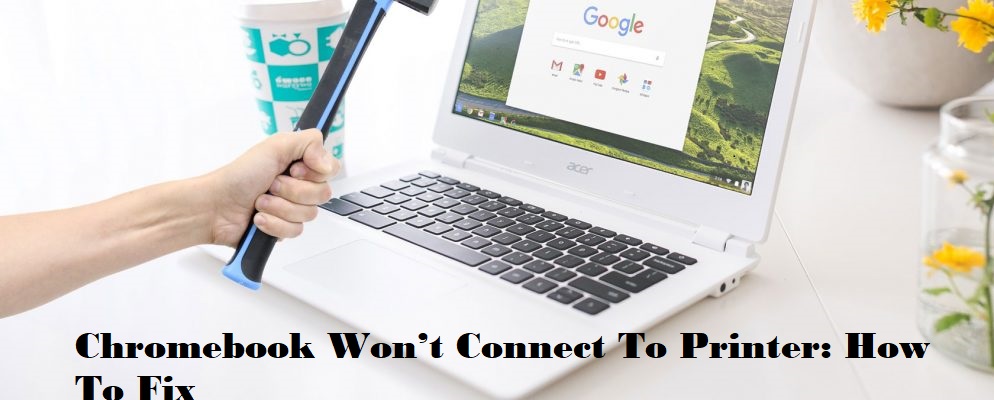
Chromebook Won’t Connect To Printer: How To Fix
You might have noticed that printers have evolved a lot with time. It feels excellent to unpack its new package. However, some users are unable to connect their Chromebook to the printer. The solutions for the problem are given below:
 Source : http://au-norton.com/chromebook-wont-connect-to-printer-how-to-fix/
The method of connecting the printer to the net
- Firstly, switch on the printer.
- Then, connect the printer to the home network.
- After that, log in to the Chromebook and connect it to that same network.
- Then, press on time. It shall be towards the end at the right-hand corner of the display.
- Next, click on Settings. It shall be placed towards the upper side of the window. It shall have the symbol of Settings.
- After that, move downwards. Press on ‘Advanced.’
- Then, search the ‘Printing’ part and view ‘Printers.’
- Next, click on the ‘Add Printer’ option.
- After that, search your printer in the given list of devices.
- Then, press on the ‘Add’ option.
Look for updates manually
- Firstly, press on time.
- Then, tap on the Settings.
- After that, click on the horizontal lines that are present towards the upper left-hand side corner.
- Next, press on the ‘About Chrome OS.’
- Then, look for updates. If any of the updates are present, they shall begin installing by themselves.
- After that, the ‘Restart’ option shall be displayed in the earlier area as soon as the update has been installed.
- Press on it for completing the installation procedure.
- Lastly, reboot the Chromebook.
Connected printer problems
- Towards the end at the right-hand corner of the display, press on time.
- Then, view the Settings.
- After that, move downwards and select Advanced.
- Next, visit the ‘Printing’ part.
- Then, select the Printers.
- After that, search for your printer’s name.
- Next, press on the ‘More option.’
- Then, press on Edit.
- Check whether you have written the wrong spelling of the printer details. If there are no typos, take out the printer and put it one more time. For doing it, press on ‘More,’ then choose ‘Remove.’
More to read
- How to Fix Images Not Loading Issue On Facebook
- How to Download Instagram videos on your PC
- How to Organize Your PDF Files
Printing a page
- Firstly, put the combination of Control+P.
- Then, search for the ‘Destination’ part.
- After that, press on the down arrow key next to it.
- Next, press on ‘See more.’
- Then, press on your printer. If it is not shown on the printer list, press on Manage.
- Lastly, press on the ‘Print’ option.
Billy Mark is a self-professed security expert; he has been making the people aware of the security threats. His passion is to write about Cyber security, cryptography, malware, social engineering, internet and new media. He writes for Norton security products at norton.com/setup.

Best Ways To Hide Messages On iPhone
Text messages shared from phones are usually very private. So for hiding your personal information on your iPhone, you need to go through the given below steps carefully.
 Source : http://2norton.com/best-ways-to-hide-messages-on-iphone/
The method of turning off the Lock Screen Message Preview
Luckily, it can be disabled from the Settings menu.
- Firstly, view the Settings application.
- Then, visit the Notifications.
- After that, press on Messages.
- Next, move downwards.
- Then, search the Include part.
- Note that the Include option is enabled by default. Press on it for disabling it.
- Then, request an individual to send a message to you.
- After that, lock the iPhone.
- Lastly, check whether the messages preview feature has been turned off or not.
The method of turning off Lock Screen Notification
- Firstly, view the Settings application and view the Notifications.
- Next, press on Messages.
- Then, search for the Show on Lock Screen option.
- After that, click on Show on Lock Screen option for disabling it.
- The time you are on it, you might wish to turn off the Badge App symbol too.
Note: Turning off the Badge Application symbol option deletes the small badge which displays the number of unread texts from the Message application symbol.
The method of hiding texts inside the messages application using HiddenConvos
- For jailbroken iPhone users: Go to Cydia and then install the HiddenConvos tweak.
- After installing the tweak, view Messages and pull left on any chat that you wish. A new Hide option shall get displayed. It shall be after to Delete option.
- Then, press on it. It shall make the chat vanish without letting it get deleted.
- For making it display, you need to click on the Edit and, then press to Unhide All.
More to read
- How to Fix Images Not Loading Issue On Facebook
- How to Download Instagram videos on your PC
- How to Organize Your PDF Files
Some other apps for hiding messages
Having a Jailbroken iPhone is not possible for each. You shall be able to maintain privacy by the given below apps that have been mentioned below. So have a look at it carefully.
- CoverMe
It can be called a complete package for maintaining your privacy. It comprises not just texts but also calls which are secured by the military-grade encryption algorithm, self-destructing messages, etc.
It has useful features which allow us to have access to the control settings and let your phone be safe. This app can be used free of cost. But the thing that should be noted over here is that majority of the features need an in-app purchase for unlocking.
- iDiscrete
iDiscrete is a bar where things can be stored. Over here, you can have each of your private texts for maintaining secrecy. Luckily, it can comprise of things like videos, pictures to messages, and so on.
Billy Mark is a self-professed security expert; he has been making the people aware of the security threats. His passion is to write about Cyber security, cryptography, malware, social engineering, internet and new media. He writes for Norton security products at norton.com/setup.

Norton.com/setup – Product Activation Key
Visit Norton Setup to Activate Norton product by entering the 25-digit product key. Purchase Norton security solutions from Norton Setup and follow a step-by-step guide on official site norton.com/setup to download, install, and activate Norton Antivirus on your device

More to read

How To Hide Apps On Android Device
In order to keep your smartphone out of sight from other people and keep things private, you can hide apps. Hiding apps is very popular due to some privacy issues regarding a device or a computer system. It is very effortless to hide your applications on the Android smartphone. To know all the steps to hide apps on Android phone, follow these simple steps:
 Source : How To Hide Apps On Android Device
Hiding Apps by deactivating Pre- Installed Apps
- First of all, launch the “Settings” app.
- Click on the “Applications” tab. In case the setting menu contains any headings, hit the on the “Devices” title.
- Click on the “Application Manager” button to adjust its apps and to modify it.
- Hit on the “All” button.
- Now select the application you want to hide.
- Now you have to tap on the “Disable” option to hide it from your home screen. In case the application is not pre-installed, this selection might recommend you to uninstall it instead of hiding. You can look for your disabled app in the “Disabled” segment of the Apps bar.
Hiding Apps by App-Hiding Application
- Firstly, go to the Google Play Store and then tap to open it.
- Now touch at the search bar located at the top of your play store page.
- Type the name of any third party launcher app like “Apex Launcher” or “Nova Launcher” from the list of related choices.
- Touch on the “Go” option on your Android keyboard.
- Now you have to check the user’s review and choose a highly rated app before installing it on your smartphone. It is recommended to install a highly rated app as it’s always a good thing to use trusted apps.
- Now hit on the app that you have selected to download.
- Then you have to click on “Install” or “buy” button located at the upper right portion of the screen. In case the app isn’t costless, you may need to authenticate it.
- Now hit on the “Accept” button if the prompt comes. After this action, the app downloading process will start.
- Once the process of downloading completes, you have to hit on the “Open” option from the two options available in the Play Store. You are free to launch the same app from your app drawer.
- Now follow up all the steps available on the application’s on-screen window. The process of the launcher app is different as per the app.
- If you have installed a Nova launcher, then go to the “App & Widget Drawers” option and then on “Hide Apps.” Now check the app you have hidden.
- In the case of Apex launcher, you need to hit on the “Apex Settings.” Then hit on the “Drawer Settings,” next tap on “Hidden Apps.”
- Now shut the launcher app. You can see that your selected apps are now hidden.
Billy Mark is a self-professed security expert; he has been making the people aware of the security threats. His passion is to write about Cyber security, cryptography, malware, social engineering, internet and new media. He writes for Norton security products at norton.com/setup | norton.com/setup .

How to Download Instagram videos on your PC
Instagram is amongst the most trending and likable social media platform around the world with billions of users. It provides best of the features to its users. Instagram allows you to upload your photos or videos on it as a story as well as a post. On Instagram, you can connect with other users by using its amazing messaging features. Besides, several Instagram users often ask how they can download Instagram videos on their PC. Downloading Instagram videos with the app is quite easy for some users but downloading them on PC is quite a difficult task for them. Downloading Instagram videos is as easy as it sounds, and it can be done in a couple of minutes by following these methods I have mentioned in this article. Go through the guidelines below to do the task in no time.
 Source : http://asknorton.com/how-to-download-instagram-videos-on-your-pc/
By using third-party apps
Third-party apps are the first and easiest ways available to you to download Instagram videos on your PC. There are many of the third-party apps out there by which you can download any video on Instagram. Follow the steps listed below:
- Open up the browser on your PC you are currently using.
- Go to the Gihosoft TubeGet website and download the software available there.
- After the download completion, Install the software on your PC.
- After the successful installation of the software on your PC. Click on its shortcut icon on the desktop to open it up.
- Now, open that Instagram video you are willing to download by copying the link of that video with your browser.
- Next, go to the Gihosoft TubeGet and paste the copied URL in its search bar.
- Now choose the quality of the video and the location of it.
- After making your choices, click on the Download button.
- Now, access the video on your computer, and you are good to go.
Similar Articles
- How to Fix Images Not Loading Issue On Facebook
- How To Fix Windows Error Code 10
- How to Organize Your PDF Files
By downloading through an online site
It is another effective method you have to download the Instagram video at your fingertips. Online sites are quite a good source to download Instagram videos. Go through the steps listed below to do so in time;
- First of all, open the browser you are using on your PC.
- Enter Downloadgram in URL and press Enter.
- Now, login to your Instagram account by entering your account credentials.
- Locate the video you want to download.
- Now, open that video and copy its link.
- Go back to Downloadgram and paste the copied URL of the video in it.
- After pasting the URL, click on enter.
- There lies the Download button to download your video.
- Click on it and choose the resolution of the video and its location.
- Access the video on your computer, and you are good to go.
Billy Mark is a self-professed security expert; she has been making the people aware of the security threats. Her passion is to write about Cyber security, cryptography, malware, social engineering, internet and new media. She writes for Norton security products at norton.com/setup.

How to Fix Images Not Loading Issue On Facebook
Facebook is amongst the best and most preferred social media platform around the world with billions of its users. It allows you to connect with your friends and family with amazing messaging and calling features. Facebook has been used mainly to upload photos and video, but several Facebook users complain of now able to upload photos on Facebook sometimes. For several obvious reasons, there is no fun using a social media app or website like Facebook when you are not able to upload your photos and videos on it. So if you are among the users who are facing the same issue of not uploading photos on Facebook, then you have come to the right place. In this article, I have mentioned some of the best and easy methods by which you can resolve this issue in no time.
 Source : http://hbnorton.com/how-to-fix-images-not-loading-issue-on-facebook/
By checking the Internet connectivity
It is the most common factor that causes such issue of not uploading photos on Facebook. This social media platform requires an Internet connection to work. Go through the steps mentioned below to check if the internet connection is working properly or not:
- At first, try some other apps on your phone that requires an Internet connection.
- If the Internet is working properly, perform an online Internet speed test to check its speed.
- Switch to the Private mode if you are using a public or organizational Internet.
- If everything usually seems OK then try some other Internet connection available to you.
By updating the version of Facebook you are using
The outdated version of most of the apps often causes such problems to users. It is best to check from time to time whether the apps you are using have been updated or not, and the same goes with the Facebook app on your phone. To update the Facebook app on your phone, follow the guidelines below:
- At first, Select Play Store on your smartphone screen.
- Tap on the three lines available at the top left corner of the screen.
- Choose My Apps & Games option from the list.
- Find Facebook in the Pending Updates list.
- Now, tap on the Update option available parallel the app.
- The moment you tap on the Update, the Facebook app will be installed with its latest version and features on your smartphone.
- After installing the app successfully on your smartphone, try uploading a picture with the Facebook app and check if the issue persists or not.
Similar Articles
- How to Download Instagram videos on your PC
- How To Fix Windows Error Code 10
- How to Organize Your PDF Files
By changing your host’s file
Changing hosts files can be really helpful in this scenario. Every PC has its own hosts file to map the IP addresses of the Internet connections you use. To change the host file on your PC, follow the guidelines below:
- Press Windows key + S and type ‘command prompt’ in the Run dialog box.
- After that, choose Run as Administrator.
- Now, use the following command:
- notepad.exe c:/WINDOWS/system32/drivers/etc/hosts.
- Press Ctrl + F and type the sentence in the box:
- 31.13.70.40 scontent-a-sea.xx.fbcdn.net.
- Save changes and exit from the window.
- Now, restart the PC to apply the changes successfully.
Billy Mark is a self-professed security expert; he has been making the people aware of the security threats. His passion is to write about Cyber security, cryptography, malware, social engineering, internet and new media. He writes for Norton security products at norton.com/setup.

How to Organize Your PDF Files
There are many ways to organize PDF documents. One can do this with the help of My Bookshelf feature and DocQ.com. With the help of these two features, you can easily organize your PDF files and can access them from anywhere. In case you don’t have access to Adobe Acrobat 7 version, DocQ.com enables you to transfer your PDF documents and can keep them in the folder. It also provides backup support for files and documents along with many other tools.
 Source : http://au-norton.com/how-to-organize-your-pdf-files/
There are some steps that you can use to manage your PDF files very comfortably:
Organizing PDF Files with the help of Adobe Acrobat
1. Open “My Bookshelf” icon in the File option. Then a pop-up dialog box will open.
2. Now tap on “Add File.” Now the “Add File” pop-up window will open on your computer screen.
3. Browse the PDF file you wish to add, Now select your desired PDF document and then press “Add” button. It enables the Adobe Acrobat to add your picked document into the gallery of the bookshelf.
4. From the pull-down list of Category-1, select a section for your PDF file that you want to choose.
5. If you desire to manage your document into two different categories, click on the second option under Category-2. Adobe Acrobat enables you to categorize it into parts. Category-1 and Category-2 contain the same options.
6. With the help of Edit categories option from the pull-down menu list, you can add more categories to the list of Category 1 and Category 2. The “Edit Category” option is present at the uppermost part of the “My Bookshelf” dialog box. After clicking on “My Bookshelf” option, My Bookshelf pop-up box will open on your screen.
7. Now enter the category name that you wish to create, then click on the “Add” button to include it.
8. Press on the “OK” button to close your Bookshelf categories dialog box.
9. You can see all the PDF documents in separate categories after you have organized PDF documents into various sections. Under the Pull-down list, you have to type the category name. For instance, if you choose History, you will be able to view the documents under the History category below the My Bookshelf pop-up box.
10. For the quick opening of your PDF documents that you have categorized, double-press the document name under the My Bookshelf pop-up box. The Adobe Acrobat will open your particular document.
Similar Articles
- How to Insert a Check Mark Symbol in Excel
- How To Add A Text Box In Word?
- How to Install Touchpad Precision Drivers on a Windows Laptop
- How To Fix Windows Error Code 10
Organizing PDF documents using DocQ.com
1. Create a docq.doc account and gets activated it.
2. Then upload your desired documents from the Upload tool.
3. Make important document folders by entering the find box.
4. Any files can be added manually by dragging the selected file into the smart folder.
5. Alternatively, tapping on the tag icon of any particular file add the tag.
6. DocQ requires full text to be entered in the search bar.
Billy Mark is a self-professed security expert; he has been making the people aware of the security threats. His passion is to write about Cyber security, cryptography, malware, social engineering, internet and new media. He writes for Norton security products at norton.com/setup.

How to Organize Your PDF Files
There are many ways to organize PDF documents. One can do this with the help of My Bookshelf feature and DocQ.com. With the help of these two features, you can easily organize your PDF files and can access them from anywhere. In case you don’t have access to Adobe Acrobat 7 version, DocQ.com enables you to transfer your PDF documents and can keep them in the folder. It also provides backup support for files and documents along with many other tools.
Source : http://au-norton.com/how-to-organize-your-pdf-files/
There are some steps that you can use to manage your PDF files very comfortably:
Organizing PDF Files with the help of Adobe Acrobat
1. Open “My Bookshelf” icon in the File option. Then a pop-up dialog box will open.
2. Now tap on “Add File.” Now the “Add File” pop-up window will open on your computer screen.
3. Browse the PDF file you wish to add, Now select your desired PDF document and then press “Add” button. It enables the Adobe Acrobat to add your picked document into the gallery of the bookshelf.
4. From the pull-down list of Category-1, select a section for your PDF file that you want to choose.
5. If you desire to manage your document into two different categories, click on the second option under Category-2. Adobe Acrobat enables you to categorize it into parts. Category-1 and Category-2 contain the same options.
6. With the help of Edit categories option from the pull-down menu list, you can add more categories to the list of Category 1 and Category 2. The “Edit Category” option is present at the uppermost part of the “My Bookshelf” dialog box. After clicking on “My Bookshelf” option, My Bookshelf pop-up box will open on your screen.
7. Now enter the category name that you wish to create, then click on the “Add” button to include it.
8. Press on the “OK” button to close your Bookshelf categories dialog box.
9. You can see all the PDF documents in separate categories after you have organized PDF documents into various sections. Under the Pull-down list, you have to type the category name. For instance, if you choose History, you will be able to view the documents under the History category below the My Bookshelf pop-up box.
10. For the quick opening of your PDF documents that you have categorized, double-press the document name under the My Bookshelf pop-up box. The Adobe Acrobat will open your particular document.
Similar Articles
- How to Insert a Check Mark Symbol in Excel
- How To Add A Text Box In Word?
- How to Install Touchpad Precision Drivers on a Windows Laptop
- How To Fix Windows Error Code 10
Organizing PDF documents using DocQ.com
1. Create a docq.doc account and gets activated it.
2. Then upload your desired documents from the Upload tool.
3. Make important document folders by entering the find box.
4. Any files can be added manually by dragging the selected file into the smart folder.
5. Alternatively, tapping on the tag icon of any particular file add the tag.
6. DocQ requires full text to be entered in the search bar.
Billy Mark is a self-professed security expert; he has been making the people aware of the security threats. His passion is to write about Cyber security, cryptography, malware, social engineering, internet and new media. He writes for Norton security products at norton.com/setup.

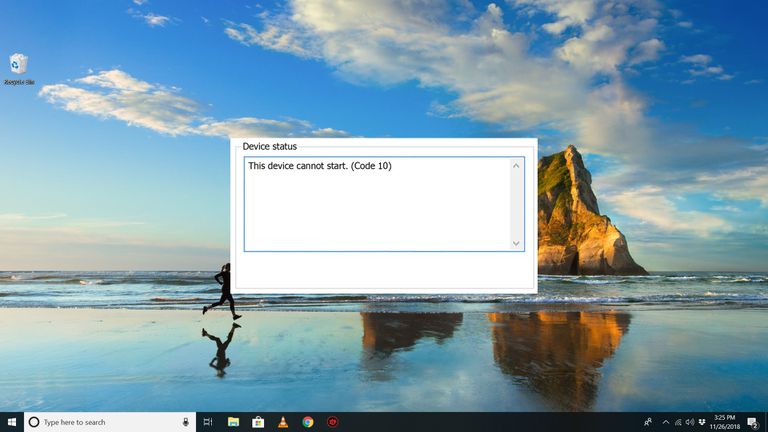
How To Fix Windows Error Code 10
Many errors are generated in the Device Manager of the system. The error code 10 also comes into sight on various versions of Windows and is initiated chiefly in Device Manager of the system. It is mostly correlated with the hardware and driver’s conflicting problems.
 Source : http://2norton.com/how-to-fix-windows-error-code-10/
Restore Drivers to Past Versions ( Windows 8.1 and 8)
Steps to follow to rollback drivers to previous versions:
1. Tap Window Key + C.
2. Now the Champs Bar will show on your screen. Then select on the Setting option.
3. Press on the Control Panel icon.
4. Then users have to select System and Security> Administrative Tools.
5. Now double tap on the Computer Management option under it.
6. Enlarge these nodes like Computer Management> System Tools> Device Manager.
7. Now press on View. Then just click on Show hidden devices. In case you find any devices marked with a yellow exclamation sign, then it means these types of devices are out of order.
8. Now right-click on the disruptive device, then click on Properties.
9. Press the Driver tab and Rollback button to follow the ongoing directions on the system.
Restore Drivers to last Versions (Windows 7 or Vista)
1. First of all, press on the Start button on the taskbar pane.
2. Now tap on Control Panel.
3. Now tap on the F3 key on the keyboard.
4. Now enter ” Device Manager” in the search bar present on the upper-right edge of your Control Panel window.
5. Now launch the Device Manager with the help of the Search Result webpage.
6. Now press on View> Show hidden devices. In case you find any devices marked with a yellow exclamation sign, then it means these types of devices are somewhat out of order.
7. Now press Right button to a disruptive device, then click on Properties.
8. Press the Driver tab and Rollback button to follow the ongoing directions.
Similar Articles
- How to Insert a Check Mark Symbol in Excel
- How To Add A Text Box In Word?
- How to Install Touchpad Precision Drivers on a Windows Laptop
- How to Organize Your PDF Files
Leave Hardware boosting (favorable for Windows 7 or Vista)
1. Click Window key + X simultaneously. Now choose the Search option.
2. Now your Start screen will launch on the screen. Then enter “desk.cpl” in the search bar.
3. Press on Apps option and launch the keyword from the
Search Results.
4. Now you can see that your window will show the opening of the screen resolution page. Now go to “Advanced settings” link and press troubleshoot option tab. The graphics card will not support Hardware Acceleration feature without Troubleshoot Buttoned icon.
5. Now you have to shift the slide bar to fix Hardware Acceleration: Nil.
6. Press on OK two times and then exit.
Billy Mark is a self-professed security expert; he has been making the people aware of the security threats. His passion is to write about Cyber security, cryptography, malware, social engineering, internet and new media. He writes for Norton security products at norton.com/setup.

PUBG Mobile 0.14.5 Update With Royal Pass Season 9
PUBG Mobile Players received a ‘minor update’ on Thursday, and the latest 0.14.5 update brings the latest Royal Pass Season 9. It include a few minor improvements like a redesigned of missions’ page, an upgraded Royal Pass sharing page, and a new season timer section as well. Creator Tencent Games says that it requires only 0.2GB of space to update the game latest version and most important update is that players on different versions won’t be able to invite each other. Thereby, it is recommended to update as soon as possible to enjoy the game.

PUBG Mobile game update
The PUBG Mobile 0.14.5 update is rolling out as we speak, and it should arrive in your Google Play Store and App Store listings soon. Royal Pass Season 9 have a new warrior theme with armored wardrobe, updated excited missions, and valuable loot as well. Rewards include a chance to win a journey to PUBG Mobile Club Open (PMCO) 2019 Fall Splits Global Finals as part of the Global Treasure Hunt Challenge.
Author
Billy Mark is a self-professed security expert; he has been making the people aware of the security threats. His passion is to write about Cyber security, cryptography, malware, social engineering, internet and new media. He writes for Microsoft products at office.com/setup.
More to read
- How to Insert a Check Mark Symbol in Excel
- How To Add A Text Box In Word?
- How to Install Touchpad Precision Drivers on a Windows Laptop
